
Replacing Existing Aluminum Windows
These are the instructions for doing
replacement windows where there are existing aluminum windows. The
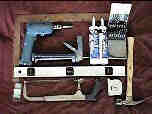
tools you need are to the lower left.
If every thing checks out
you are ready to begin. First, take out the moving panel and the
screen. Then you need to get the fixed panel out. In some cases,
like in our example, there are screws that hold in the fixed panel.
Simply remove these screws (bottom left) then take out the fixed
panel (bottom left middle). It may stick a little because of the
caulking but a little prying should break it loose. With the fixed
panel out you can now remove the meeting rail. On some windows, you
may need to take this out first, then remove the fixed panel.
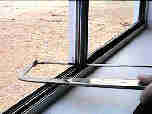
Sometimes there are screws that hold the meeting rail in place. You
can take these screws out and simply remove the rail. In the window
in our example there are no screws for the meeting rail, so we had
to cut it with a hacksaw (bottom right middle). In a few windows,
you may have to break out the glass in the fixed panel, and then
remove the meeting rail. Once this and the fixed panel are out you
are ready to put in the new window.
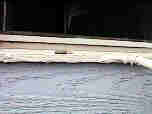
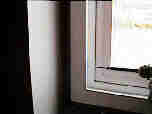
We had to remove the old wood trim because we
needed to get flush to the old frame to give the new window a flush,
smooth surface to be mounted to (top right). Put the new window into
the opening to see how it fits, and to make sure there are no
obstructions. If you have stucco you need to make sure the surface
around the window does not protrude out past the old frame. With the
new window in place, mark around the flange with a pencil. Remove
the window, and if there are any places that stick out past the old
frame scrape them so that they are level with the frame.
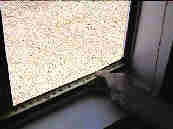
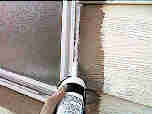
In our example the house has lap siding. The old frame sticks out
past the siding so that is not a problem. We did re-caulk the gap
between the siding and the old window frame to make sure it was
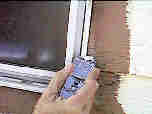
sealed well (bottom left). We then scraped the old caulking off of
the face of the old window frame to make sure we had a smooth
surface to attach the new window to (bottom right). Since the house
was being repainted soon we painted around the window because it is
easier with the new window off. Now your are ready to install the
new window.
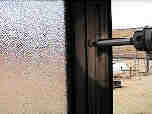
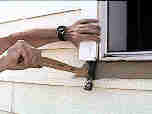
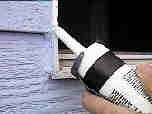
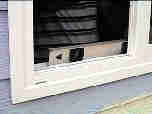
Caulk the surface of the old window
very well (bottom left) leaving a couple of gaps in the caulking at
the bottom near the old windows weep holes (bottom left middle).
This will allow any moisture that might find its way behind the new
frame to weep out. It is especially important to have a good seal
between the old and new window at the top and on the sides. Now,
with the surface well caulked, you are ready to install the new
window.
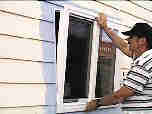
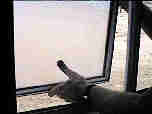
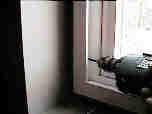
Carefully insert the new window into the opening without disturbing the caulking (top right middle). Once it is in the opening, you can then press the new window firmly up against the old frame to squeeze the caulking and make a good seal. Make sure the window is secure then go to the inside. Try to center it in the opening as well as you can. You now should check to make sure the window is plumb, level, and square (top right). This is very important to insure the correct operation of the window. Shim if necessary. The window should be supported along the bottom, especially if it is a large vinyl window, since a vinyl window is flexible. Again, use shims if necessary.
Once you have it positioned correctly then you are ready to screw it into place. Drill holes in the side of the frame for the screws to go through. You will need 2 ½” to 3” screws so that they can go all the way into the studs. Drive the screws in, being careful not to screw so hard that you pull the window frame out of square. Put screws in the sides about 18” apart.
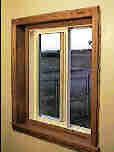

The last thing to do on the outside is to run a bead of caulking around the edge of the window trim for an extra seal against moisture getting in (remembering to leave a couple of gaps at the bottom). Now you are just about done except for trimming the inside. You will have a little gap on the inside between the drywall and the new frame. You can use wood moulding to cover this gap, or you can get a vinyl or aluminum trim from Milgard to cover the gap. If you really want to get fancy you could put wood window stool and jambs, and trim the opening with wood casing. On our sample window we use oak doorjamb to make the window stool at the bottom. We then used 1/8” oak plywood to finish the sides and top of the jamb. Then 1 ¾” ogee stop was used to cover the gap between the new window and the drywall. Finally we used 2 ½” oak 711 casing to trim around the opening and for apron under the stool. We now have a beautiful window that is more energy efficient and operates much better than the old one. Other than the inside trim it took less than an hour to complete.