
Replacing Existing Wood Windows
These are the instructions for doing replacement windows where there are existing wood windows
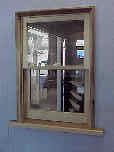

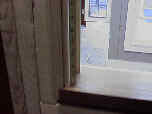
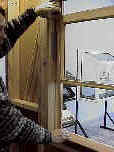
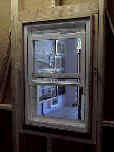
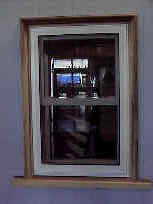
The first thing to do is to measure the opening for the replacement window (above middle). Measure the width all the way to the frame, between the moulding. Measure at the bottom, middle, and the top of the window in case the old frame is warped. Then measure the height at the left, middle, and right. Measure the height at the back of the sloped sill, at the inside stop or window stool (above right). Once you have the measurements, take them to Do It Yourself Windows And Doors. They will then help you figure out what size to order your replacement windows, and explain all the features and options available on you new windows. Your windows are then ordered, and will take about 2 weeks to receive. Once you get your windows it is a good idea to remeasure your openings and verify that the new windows will fit before you start to tear out the old windows.
If everything looks correct, you are ready to begin. On our example window the inside stop is the easiest to remove so we will start there. Remove the inside stop (below left). If it comes off easily in one piece you can save it and reuse it later, however usually the moulding gets destroyed in removal. Once the inside moulding is removed you can take out the inside sash (below middle left). Some windows will have a wire that is spring loaded, and some will have cords and pulleys. Your can just cut these to remove the old sash.
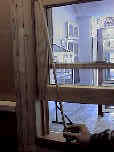
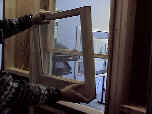
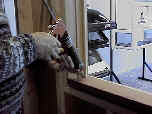
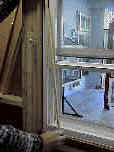
Next, the parting bead (the moulding that is between the sash) needs to be removed (above middle right). This usually is sitting in a groove in the frame and should come out easily. However, if the window has been painted many times it may be a little difficult to remove the parting bead. Since this is not going to be reused you don’t have to be careful in removing it. Once the parting bead is out, then you can remove the outer sash (above right). Again, you can just cut the cord or cable to disconnect the old sash. Make sure the empty frame is relatively smooth, and you are now ready to install the new window.
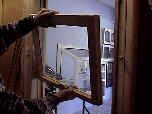
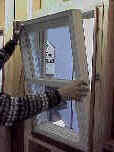
Insert the replacement window into the old frame to check the fit (1). If it is a little snug you can file or trim a little if necessary. Once you have checked the fit take out the replacement window. If you are using Milgard vinyl replacement windows, they are thick enough cover the entire jamb and mount up against the blind stop. You will then caulk around the blind stop thoroughly (2). Then install the new window into the opening and push it tightly against the blind stop to seal the caulking (3). Go to the outside and seal the seam with caulking (4). The replacement window will come with a sloped sill adapter to fill in the gap at the bottom due to the sloped sill. Caulk along the bottom to completely seal the outside. If you are using aluminum replacement windows, they are not thick enough to go up against the blind stop. You should then caulk around the aluminum window frame, and add some moulding to fill any gap.
1 2 3 4
Now that the outside is sealed we are ready to finish the inside. There will be a small gap around the edge of the new window. This is covered by moulding (5). This moulding also holds the replacement window in place. Once this is in place you are finished. Do It Yourself Windows And Doors can help you choose moulding to fill your needs. Come see us and we can give you the advice you need to do your own replacement windows, and save money by doing it yourself.
insert content here